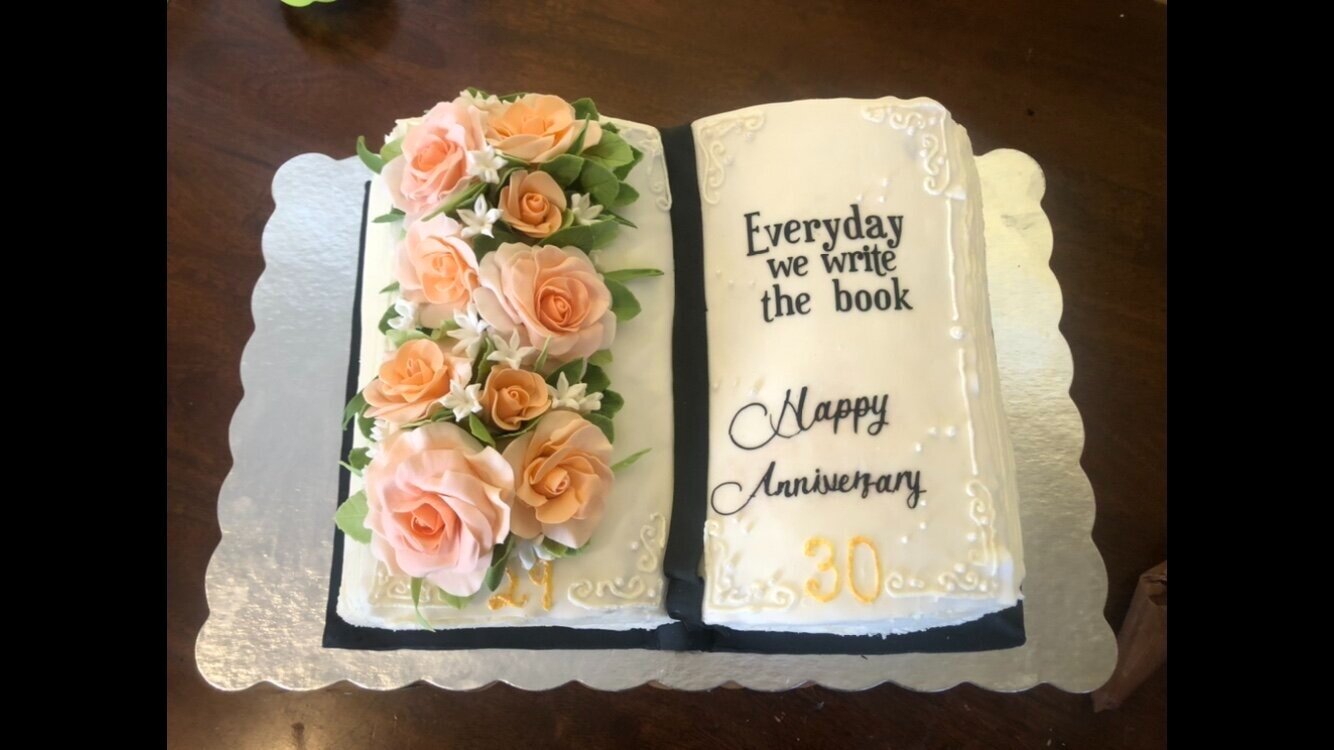
30th Anniversary Book Cake
I have been extremely lucky to be blessed with excellent bosses at nearly every job I’ve had, and my current supervisor is no exception. My boss handles his own high volume caseload of complicated litigation, while somehow also managing to supervise twenty attorneys (many of whom could be referred to as “unmanageable”). I can only imagine that it often feels like herding cats. Nevertheless, Terry manages to do it all with enviable humor, skill, and patience.
So when he asked me to make a cake for his wife for their 30th anniversary, I was honored to be asked to make such a special cake and thrilled to be able to do something for someone who is such a pleasure to work with.
Side note: THIRTY YEARS of marriage? Incredible!! Terry’s wife, Christina, is a school librarian. When we began planning this cake, we started with an idea that the design should in some way relate to Christina’s love of books.
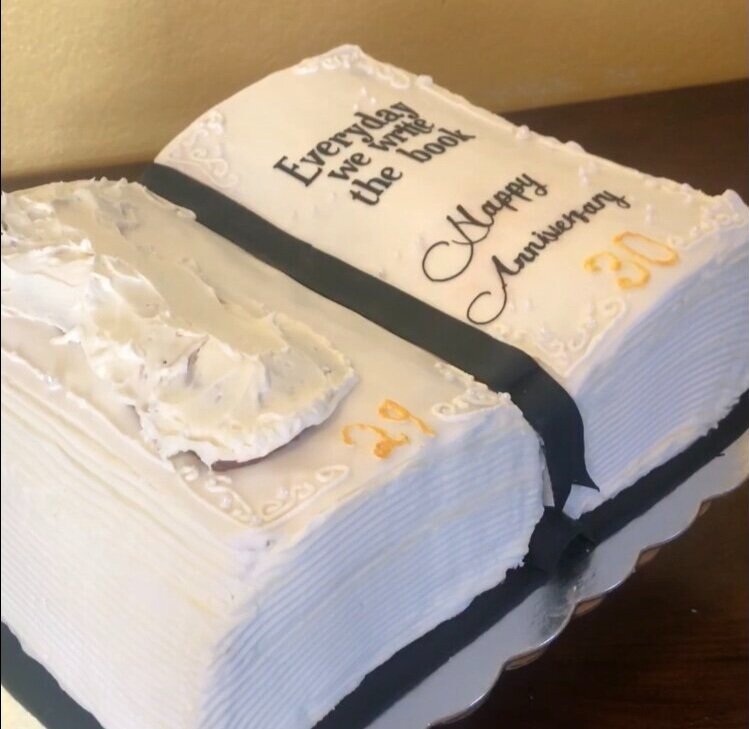
What better design could exist than a book cake? We decided on an open book design, with a mass of sugar flowers on one page, and a quote from one of the couple’s favorite songs on the other page. We also wanted to incorporate some pearls, as the 30th Anniversary is the “pearl” anniversary.
When looking through designs, Terry chose one with peach roses, because that was the color of Christina’s wedding bouquet (how sweet!) For a flavor, we went with a triple chocolate cake, with chocolate ganache, fresh raspberry filling, and a fresh raspberry mousse for the center, with vanilla buttercream exterior. I wanted the cake to be pretty tall so that it looked like a large, open book, so I went with three layers for this cake.
After we decided on the design, I realized I had absolutely no clue how to either 1.) Make sugar flowers or 2.) Carve a cake to look like a book.
Luckily, I prepared for this cake pretty far in advance and watched at least a dozen sugar rose tutorials before I started. While making this cake, I discovered that when making sugar roses, you basically should start them at least a week before you need them, because they take a very long time to assemble and dry—but when finally complete, they look so incredible! At least, not half bad for my first try, I’d say.

For this cake, I made several large, medium, and small roses as well as filler flowers and greenery. You can find my post about sugar roses here.

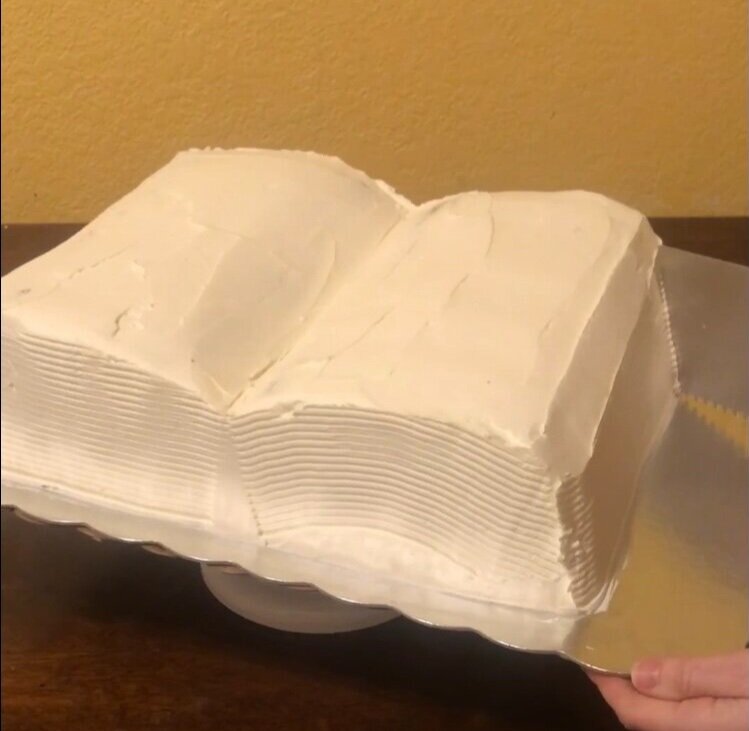
Carving the book was another matter. For some reason I thought it would be a good idea to try to carve and shape the cake before filling it—which is absolutely not the right way to do this. Instead, the cake should be filled and chilled before you carve it, so that cake doesn’t crumble everywhere when you cut or lift it.
(This is why my table is covered in cake crumbs below). 
I still think I was able to get a good book shape even after making this mistake. As you can see, at one point I broke out the only law school textbook I still have (Ethical Problems in the Law) for a reference point on the shape.
I’m not sure the book helped—either with any ethical problems I have faced in my practice of law, or with carving this book cake. Back to the cake. I basically just freehand carved the cake into a shape that somewhat resembled an open book before filling (again, not the best practice), by carving a bit out of the center and carving the sides down at a very slight angle.

My husband says that when I’m making cakes, there is generally a point where I have a meltdown and say the cake is a disaster (though it eventually comes together in the end). I would say that point in this cake was here. Don’t worry, once frosted, the shape looked much better.
After a mini meltdown, I filled and assembled the cake. Because the cake had a more fluid filling, I piped a buttercream “dam” around the edge of each layer to hold in the filling in.


After filling the cake and carving a bit more, I crumb coated the cake with chocolate frosting and allowed it to chill for at least an hour in the fridge. To smooth the buttercream on curved parts of the book, I used a small acetate sheet rather than an offset spatula.

I then frosted the outside of the cake with a bright white vanilla buttercream. I smoothed the frosting first, then to make the “pages” on the sides of the cake, I used a frosting comb with a small pointed edge. I had to go over the sides several times to get the lines of the “pages” just right.
I then chilled the cake overnight, and began working on the top of the cake. For the top page of the cake on each side, I rolled out bright white fondant into an extremely thin rectangle, and cut it to the size of the cake. I followed this process with the second side, and attached both to the top of the cake, folding the edges and corners a bit to make it appear ruffled like a real page.
If you really hate the taste of fondant, you don’t have to use it here—but I thought it would be a bit smoother than the buttercream. 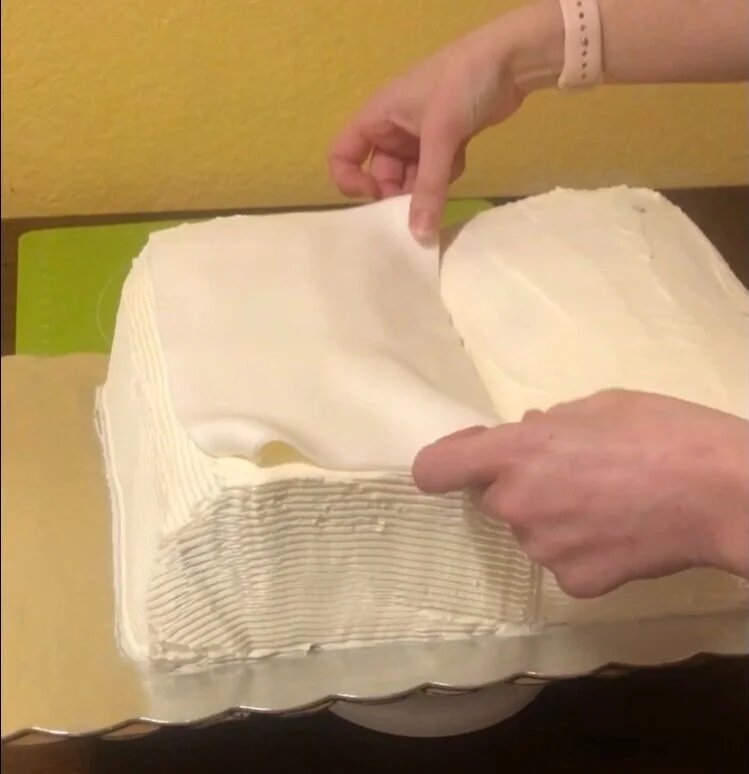
After the pages were attached, I worked on the covers of the book and the bookmark, using black fondant. For the cover, I just rolled out strips of black fondant, cut them with an exact-o knife to the size of the book, and attached them to the sides, top, and bottom of the cake. I gently pushed each into the frosting to adhere. For the bookmark, I did the same, but cut a small triangle out of the bottom of the strip of fondant to make it appear like a ribbon.
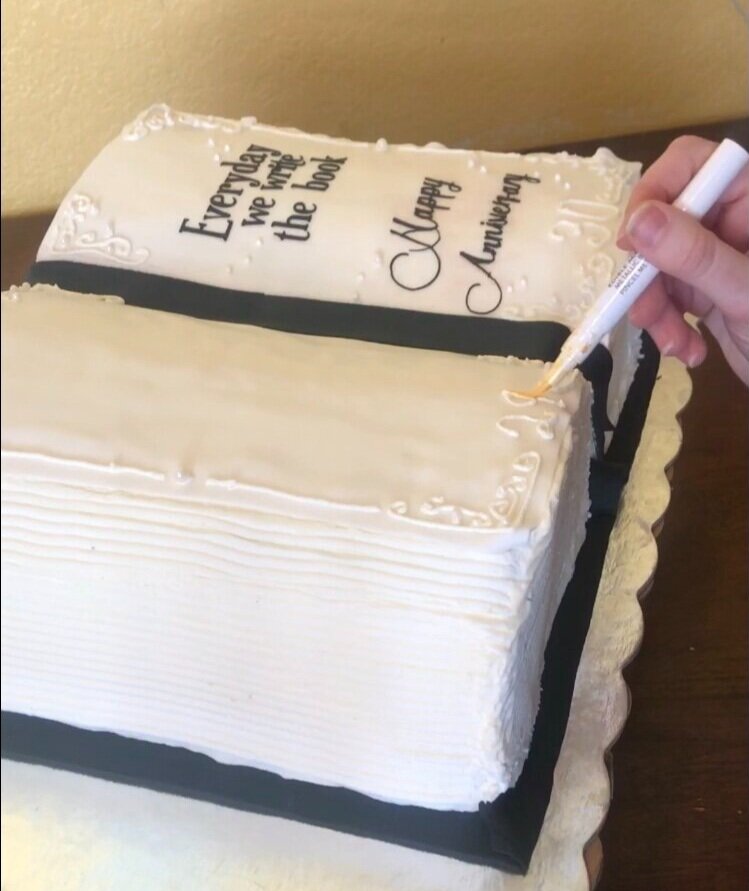
Unfortunately, this part was also a mini meltdown point as I was frustrated with how the page lines turned out, so I forgot to film the covers/bookmark.After this, I added the lettering to the right page. I used my Cricut to cut the wording out of an edible sugar sheet because there is no possible way I could have piped lettering or cut fondant lettering that smoothly, and I think the particular fonts I chose went really well with this cake. You can find my post on Cricut for cake making here.
Cut sugar sheets can be applied to either buttercream or fondant using a dab of water to the back of the sugar sheet as “glue,” and gently pressing the sugar letters or cut shapes onto the cake. Here, I used a spray bottle to lightly mist the fondant before placing the sugar letters.
The lettering was a play on a quote from one of the couple’s favorite songs, David Costello’s “Everyday I write the Book.” 
I then piped on some scrolls and dots along the edges and corners of the top pages to give the cake a little bit more intricacy. I also piped on page numbers at the bottom. Of course, I went with a big 30 on the right page. The numbering was painted over with gold edible food paint so that it popped from the page. I also added a few pearl sprinkles throughout the top pages of the cake.
After this, I piped on a big lump of frosting on the left page where I wanted my flowers to go. I wanted them to be sort of raised from the page, so I made the frosting kind of like a little hill shape.
To finish, I attached the sugar roses, greenery, and filler flowers by gently pushing them into the frosting lump. I filled them in until there were no gaps between the flowers and greenery.

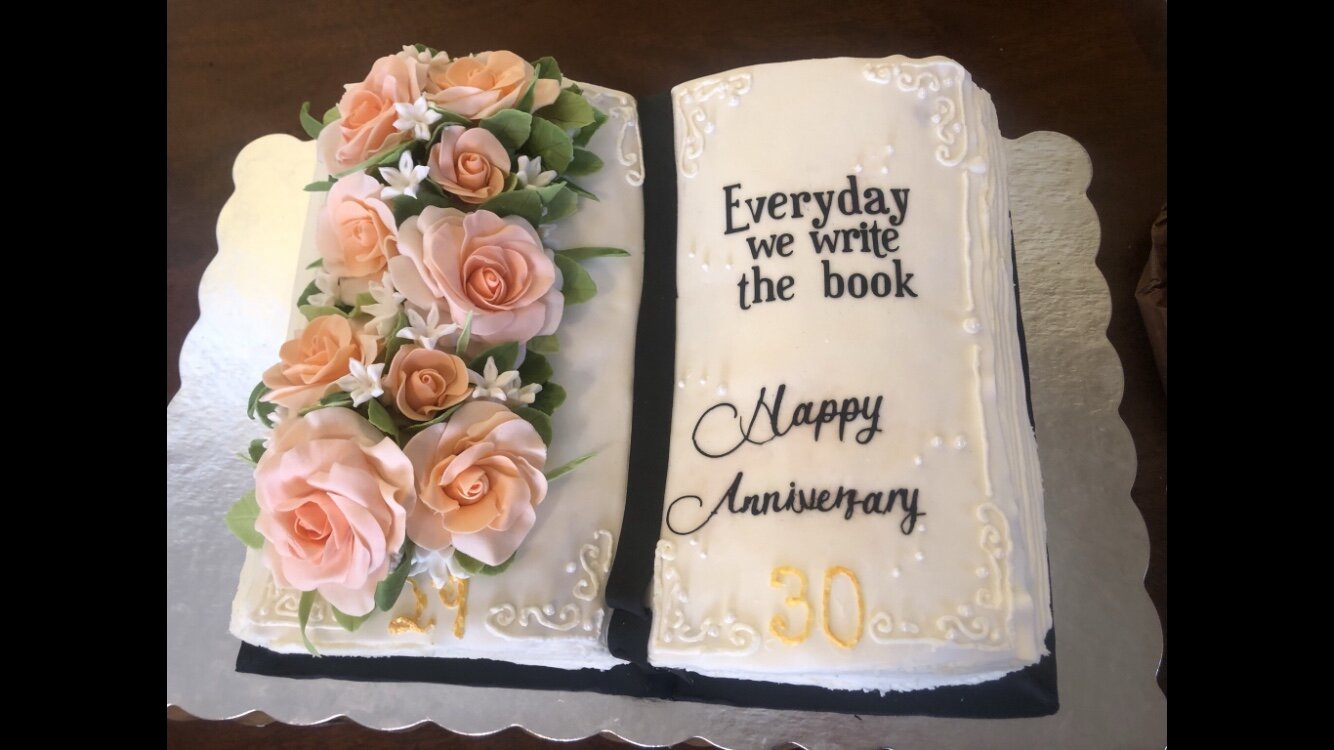
And that was it! I was happy with the color and look of the flowers on this cake and I think it turned out well. Would you love a cake like this for your 30th Anniversary? Let me know what you think in the comments below!